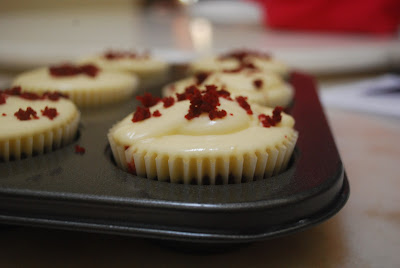
By far my most successful venture into baking in... 2 years? Ever since I entered university, all my baking product ended up either
1. Not rising (even when I follow the recipe and add the exact amount of baking powder and soda that the recipes call for)
2. Or it's outsides get burnt but it's inside are unbaked >.<
In other words, pretty inedible.
Mom has been craving for red velvet cake for almost a week and she's been pestering me to buy the cake whenever I run across them outside. But as luck have it, there are no red velvet cakes to be found. So I decided to matters into my own hands and bake the cake for my mom! (See mummy, don't you ever say I only bake cakes for my boyfriend. I baked this one for you hehe)
This cake also marks the VERY FIRST TIME I'm using food colouring. Since forever, I balk at the idea of using artificial colouring for cakes. And before yesterday (before I properly researched about the cake), I naively thought the redness for red velvet came from beetroot and I did not give a thought to the extreme redness when I 'nom nom' them. Granted, red velvets from eons ago ARE made from beetroot but consumers these days want RED red velvet cakes. Natural colouring from beetroot will turn chocolate after baking and occasionally they even have a muddy smell and taste so commercially it's been replaced by colouring =(
Kinda hesitant to make this cake because of the huge amount of colouring but mom has been pestering so... BAKING TIME AGAIN!
Recipe from here (Divas Can Bake). Her other recipes looks very yummy too, especially the Nutella Fudgesicles. I wanna try that! =Q
Anyway, wanna show you guys the addition of the red colouring into my white, pure liquid part of the cake. Because... I'm fascinated by it and maybe you guys might be fascinated by it too XD
This recipe calls for 2-4 tsp of red colouring. I wanted to put the minimum amount (I don't really fancy artificial stuff in homemade cakes =S) but mom complained it wasn't enough =(
At this stage it looks kinda like the raspberry swirls on ice creams. Pretty =3
This is the stage which looked most disgusting >.< Almost like blood...
The finished product. With and without frosting. I love how this frosting is so easy to handle compared to the butter cream I used last week for the checkerboard cake.
Spot the odd one out!
Look how the cream is spilling out from the side! Malaysian weather is too hot and so we have to put it into fridge to set.
The unveiling of the cupcake!
Verdict: NOT BAD. Not bad at all =) It's almost... Good XD
Few complaints from my food testers though. Frosting was too fine and cake was too moist. I personally like that but I guess everyone have their own preference =O
This is a recipe that I'll gladly say: GO AHEAD AND TRY IT =D Because even a person with a low baking success like me manage to do this too hehe.
Oh mom said it was good too ;)
Ending this post with another red pic. A handmade crochet red heart! Pattern from MyGurumi.


nice!!! you can try chef john's recipe for red velvet cupcakes. i tried it last time and it turned out really good taste wise. http://iamhighoncatnip.blogspot.com/2011/10/red-velvet-cupcakes.html
ReplyDeleteexcept that according to that recipe i used the wrong topping. it's suppose to be cream cheese but i made buttercream frosting instead. haha XD
his red velvet cupcake vid http://www.youtube.com/watch?feature=player_embedded&v=cwLQUsJgt2M